Dehydrated Snackings: Apple & Beet Chips

Because we all need a little munch in our life without added preservatives, you know? These recipes below are simple, crunchy, healthy, and totally addictive. The only problem we have with them, is how fast they seem to disappear from the pantry. Within moments, they’re just.. gone. 

Seasoning your chips is to your preference, but these recipes tend to lean toward a lil' sweet, and a lil' savory. If you're looking for a lot  of chew (like tough as leather), it's better to leave your chips in the dehydrator for a few hours less. For a crunchier bite, stick to our advised dehydrating time of about 12 hours.
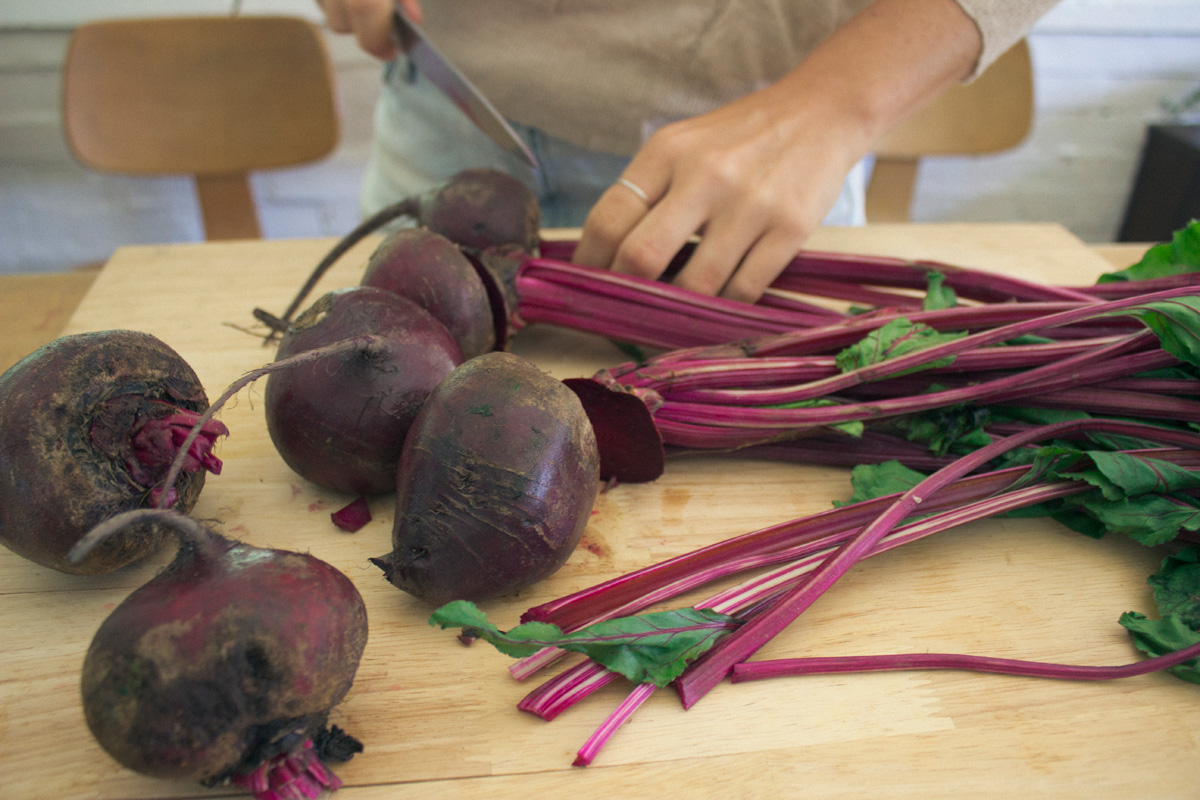
 

Beet Chips


Ingredients:

 5 beets, I used golden and red
1/4 cup apple cider vinegar
1 tablespoon olive oil
1/4 cup water
Himalayan salt and pepper to taste


Method:

1. Mix together cider vinegar, oil and water. Set aside.

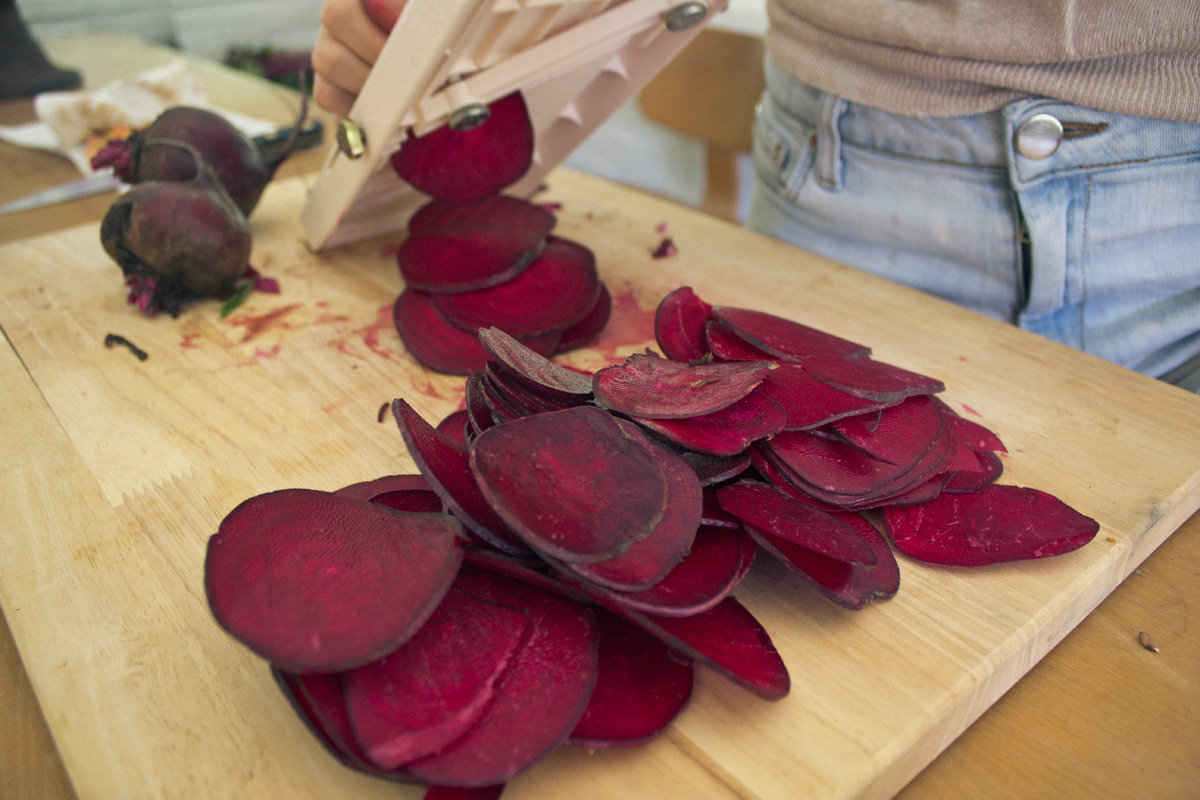
2. Slice the beets very thin. I used a mandoline for this.

3. Soak the sliced beets in the water mixture for about 10 minutes. You may have to toss to coat.

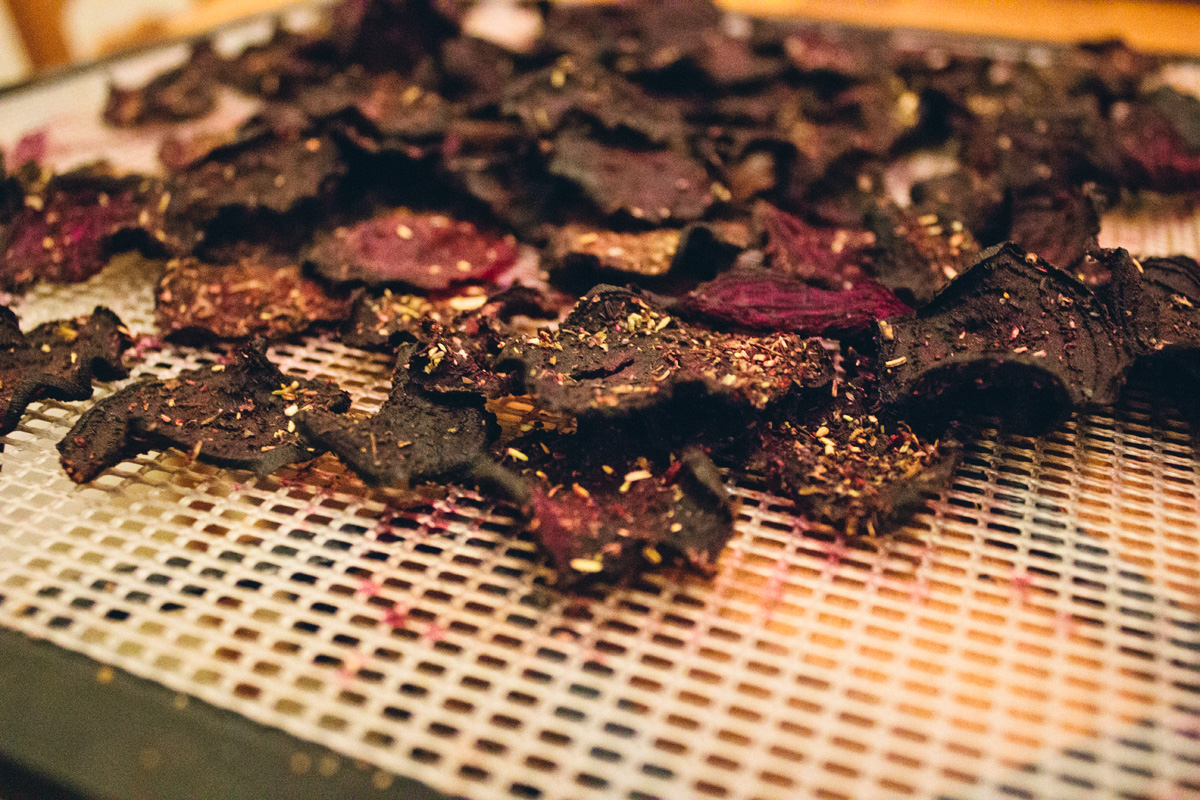
4. Spread on screens, sprinkle with salt and pepper. Dehydrate at 145 for 45 minutes, reduce heat to 115 and continue dehydrating for about 12 hours or until chips are crunchy. 

*Note: Don’t worry about beginning dehydration temp. The food never goes above 115 and it’s raw integrity is not compromised.


Cinnamon Apple Chips


Ingredients:

6-8 apples
5 tbsp lemon juice
1 tbsp maple syrup (optional)
2 tsp cinnamon


Method:

1. Slice the apples as thin as you can get them. The key tool to have to make a wafer thin, uniform, crisp apple chip is a mandolin.

2. In a bowl, combine apples, cinnamon, whatever spices, and lemon juice. Mix around so both sides of the apple rings are coated in the mixture. 

3. Place apple rings on mesh drying trays one at a time. Dry at 155°F for about 4 hours or until firm and crisp. Remove from trays, transfer to a wire rack and let cool completely. Serve immediately or store in an airtight container at room temperature for up to 3 months.

4. Embrace the smell of your kitchen. 


Raw Rosemary & Cayenne Flax Crackers

Recently we've stepped (more like ran towards head on) into a dehydrating frenzy. Not only because it gives us an abundance of snack attacks for super cheap, but this method doesn't destroy enzymes in your raw nutrient dense food. WIN WIN here. This is a recipe with flax seeds and chia seeds, so they are very rich in Omega 3s, vitamin E, protein, B vitamins, manganese, magnesium, and fiber. With just a few other basic ingredients- raw garlic and fresh rosemary- you don't need much more than a pinch of salt to have an insanely flavorful cracker.

Take this nourishing and satisfying little snack with you camping or on a long drive and you'll be happy even if you are if the middle of nowhere.


Ingredients:

1/2 cup flaxseeds
1/2 cup hulled hemp seeds or sesame seeds 3 tbsp hulled flax
1 tbsp chia
1/4 cup fresh rosemary
1 tablespoon fresh minced garlic
1/2 tsp cayenne
1/2 c water

*Various herbs can be used to tune them to your taste. 

Method:

1. In a medium bowl mix together all ingredients and let sit for 30 minutes to let the chia and flax gelatinize. 

2. If you have a dehydrator spread mixture thinly and evenly on the liner tray. Alternatively line a baking sheet with parchment paper and set your oven to the lowest setting, leaving the oven door cracked open to help keep the temperature below 115 degrees Fahrenheit. dehydrate or bake in oven for 4 to 6 hours until crispy.

3. Break into cracker size pieces.

*Note: they can be preserved in the fridge for about two weeks and in the freezer for about two months.


Something Like Shakshuka

Cari Bernard is a whiz around her biddy Brooklyn kitchen- navigating between stove top, cutting board, sink and fridge- while I unhelpfully watch, too afraid to break her breakfast rhythm. I was lucky enough to share this morning meal with Cari just a few weeks ago, and she's been kind enough to share it with you! Stay tuned to Bloom for more freestyle food fix-ups from Ms. Cari B​, and in the meantime be sure to check out her site, Cari B Cooks.

Shakshuka is often seen as an Israeli breakfast food, but in fact it can be traced to many different cultures.  It just happens to be a wonderful jumping off point for a hearty breakfast, easy to cobble together with common pantry items.  This freestyle shakshuka doesn’t need to be made with mushrooms and escarole, that’s just what I had on hand that day. Onions and garlic are pretty key though, as is some sort of spiceiness.  The addition of avocado on the bread adds healthy fat, and helps to temper the acidity of the tomato. 

Serves 2-3


Ingredients:  

3 large eggs
5-7 button mushrooms
1/3 of a head of escarole
1/2 medium onion
2-3 garlic cloves
About 1-2 cups canned crushed tomatoes or tomato puree
Olive oil
Salt & black pepper to taste
Pinch of fennel seeds
Large pinch of crushed red pepper
Pinch of garlic powder
Marsala wine
Parsley
Avocado
Crusty bread

**large skillet with some depth to it


Method: 

1. Chop vegetables. 

2. Heat skillet over medium-high heat with oil and spices, add onion and garlic and sautee until soft.  Add mushrooms and sautee, splash with Marsala and cook down.  Add escarole and sautee until wilted. Remember to season as you go. 

3. Add enough tomato so that you have a decent mixture of tomato and vegetables that won’t reduce too far and still provides a substrate to “boil” your eggs in without burning on the bottom.  Allow tomato to heat until bubbling. 

4. Make three depressions in mixture and crack an egg into each one.  Cover skillet, reduce heat a touch, and cook until eggs are to your desired doneness. 

5. Drizzle with olive oil and season to taste.  Toast bread slices if not fresh, spread with avocado, a little bit of salt and cover generously with scoops of shakshuka.  Sprinkle with chopped parsley.


Marina's Pear Butter

Local guru of all things canned, jellied, and pickled, Marina Mertz was kind enough to let us in on her latest project, pear butter. We got the privilege to interview her on the her favorite kitchen tools, preferred produce to preserve, and of course the recipe to the delicious pear butter- worthy of eating straight out the jar.

​Oh, and did we mention that when this gal isn't busy whipping up something delicious, she's running her own business producing beautifully handcrafted waxed canvas bicycle bags? I know, dream girl. So stay tuned for more recipes, projects, and pro tips from Marina.​

What started your explorations in canning?

I attended a beginners class on canning at a sustainable living conference in 2008. This armed me with the knowledge to start canning but really the adventure began much earlier when I first got interested in cooking, canning is a natural extension of being in love with the kitchen and good food. 

Where do you source the produce for your canning? Do you grow anything yourself?

I mostly source my produce from friends fruit trees or u-pick farms, my garden right now is a little small to support canning but hopefully as the fruit trees I have planting grow I will be canning more of my own produce. Most people are more than winning to share fruit especially if they know they will get jam out of it!

What are some of your favorite fall canning projects?

I mostly can in the spring/summer, which is when tomatoes, berries, figs, grapes and pears are in season. Pears and grapes are at the very end of summer and canning them always signifies the beginning of fall for me.  

What is your favorite tool in your kitchen? In your home?

Can I pick more than one? A sharp knife is a must, my favorite knife is one made by Will Manning an amazing blacksmith. I also have been known to forget how to cook if I don't have cast iron and a gas range.

What is your favorite season?

Fall! The feelings of nostalgia, hope and potential always run strong during the brisk months. It also if when leafy greens come back into season and who doesn't love kale and arugula? 

What advice would you give to novice canners/preservers out there?

Take a class, read some books arm yourself with knowledge and then experiment. Just do it. Learn what botulism is and then don't be scared of it. Be safe. Get a jar lifter. Study candy making a little and learn what sugar does at different stages of heat. Learn how pectin works and why. You basically can't fail, even if none of your jars seal and the jam is to sweet you can always just refrigerate it and make jam bars, or if it doesn't set and is too runny label is a fruit syrup and have a magnificent cocktail. Always ask for the jars back!


Ingredients:

Sand Pears
Pectin
1/2 cup Raw Sugar Cane
Lemon Juice
Spices (optional): ginger, cardamon, star anise


Method:

1. Chop up sand pears whole, the stems/seed/peel - have pectin which will help it thicken.

2. Cook down with just enough water to allow the pears to not burn, I added star anise at this point.

3. When pears are soft, run them thru a food mill or sieve to remove any hard parts. 

4. Put back onto stove and add up to 1/2 cup of sugar per cup of pears, a tbs or so of lemon juice per cup and whatever spices you are using, ginger and cardamom are awesome. Cook down until it gets a jam like consistency and then can!

Vanilla Coconut Fig Rum Pops

Surviving summer in the south requires a handful of provisions, including but not limited to the following characteristics: icy, boozy, and fruity. One of the easiest ways to achieve this tasty trifecta is through the tried and true popsicle. It's essentially a portable piece of happiness. And for at least five months out of every year, the popsicle replaces an entire food group in the Bloom nutritional pyramid. 

We took advantage of the seasonally ripe fig trees, whole vanilla beans (rather than processed extract), and a half-used, unclaimed bottle of rum that we found in the kitchen. Combine those key ingredients with a few other basic fixings, and you're ready make the pops. Rocket ship popsicle molds are not required, but highly suggested.


Ingredients:

1 1/2 c vanilla almond milk
1 1/2 c coconut milk
1/5 c turbinado sugar
1 vanilla bean, or two tsp vanilla extract
5 figs
2 shots of rum, or liquor of choice


Method :

1. Slice the figs so they are rather thick, like the thickness of two quarters.

2. Seed the vanilla bean by pressing it flat against a cutting board and then slicing it in half. Using a butter knife, slide it across the inside of each half, scraping out the seeds.

3. Add the coconut milk, almond milk, vanilla and sugar to a medium sauce pan and warm the mixture over a low heat, just until the sugar is fully dissolved.

4. Transfer the mixture to a large measuring cup and let it cool in the refrigerator for about an hour.

5. Fill each popsicle mold with about an inch of the cream mixture and insert the popsicle sticks. Let set in the freezer for about an hour.

6. Divide the sliced figs amongst the molds and fill with the remaining mixture.

Place popsicles in the freezer until solid.


Homemade Vanilla Extract

After buying bottle after bottle of vanilla extract I got tired of running out so fast and spending the money.  The taste cannot even be compared to that of real vanilla, so I thought - why not make my own? Its takes about 8 weeks of patience, but the recipe is so simple and totally worth the wait. I bought whatever 80 proof liquor that was reasonably priced - for this recipe I used Smirnoff vodka along with a few splashes of E&J bourbon.

Your extract vessel must be clean, airtight and glass - for example: canning jars, the leftover bottle of vodka, recycled kombucha bottles.. anything of that nature. The photo below shows my vanilla before and after having been steeped for just a few months. Your vanilla will darken in color after just one week. 

IMG_0337.jpg
IMG_0344.jpg

 Method Notes: The traditional time-frame to leave your beans soaking is 8 weeks before use, but as with wine, the longer it ages the extract will continue to mature. The alcohol will fade and the flavor of vanilla will develop and strengthen. Trust your nose with this one, if it smells prominently like alcohol, it’s not ready. While some people remove the beans after the a certain amount of time and strain the liquid to have a smoother vanilla, I choose to leave my beans in. This way you can keep replenishing your infusion with more vodka as you run out.

When extract is ready, use it directly out of brewing jar for all your cooking and baking needs. Vanilla extract will keep for many months and year(s) stored at room-temperature out of direct sunlight. About every six months or so I’ll replace the vanilla beans so they continue to infuse the alcohol and give it that extra oomph. 

This liquor infusion got me thinking of other liquor infusions to experiment with: cucumbers, mint, blackberries, edible flowers, herbs, spices.. there’s a whole world of liquor infusions out there to get flavorful on.


Ingredients: 

1 liter of good vodka
8 vanilla beans
1 pt of brandy or dark rum
1/2 cup honey (shoot for locally made or raw honey) 

Method: 

1. Using a sharp knife, slice your vanilla beans down the center lengthwise, stopping 1 inch from one end. Inside the beans you will notice the vanilla “caviar”. Scrape some of  the caviar out of your beans and place in the bottle you’ll be using to store your extract. Rule of thumb: 5 beans per 8 ounces alcohol.

2. Pour in your brandy, honey and then vodka over the beans to nearly the top of the bottle, about 95% full. Seal bottle, shake vigorously for about 30 seconds, and set in a corner on the counter top, shelf, or safe place out of direct sunlight, where extract will stay for two months. Once a week shake the jar for about 10 seconds.


Wild Blackberry Lemon Scones


Follow Bloom babe Elizabeth as she explores the North Florida countryside, picking wild blackberries, hanging out with cute cats and pups, and using her loot to bake a delicious batch of (vegan) blackberry lemon scones. 


Ingredients:

8 Tb of melted coconut oil
1 1/2 c blackberries
1/4 cup sliced almonds
1/2 cup almond milk (or use regular milk if you'd like)
1/2 cup almond yogurt
2 cup all-purpose flour, plus more for dusting the work surface
1/2 cup sugar, plus extra for sprinkling
2 tsp. baking powder
1/4 tsp. baking soda
1/4 tsp. salt
1/4 lemon zest + juice


Method:

1. Whisk together the almond milk, coconut oil, and almond yogurt in a medium bowl. In another bowl, combine the flour, ½ cup sugar, baking powder, baking soda, salt and almonds in a medium mixing bowl. Whisk to combine.

2. Add the milk-yogurt-oil mixture to the dry ingredients and fold in blackberries and lemon with a spatula just until combined.

3. We used a cast iron scone mold, but if you cant finagle one of those you can just roll the dough into a 12-inch square. Using a sharp floured knife, or a sharp dough scraper/chopper, cut the circle into 8 equal triangles (like pie wedges). Transfer to a parchment lined baking sheet.

4. Lightly sprinkle the tops of the scones with sugar and more sliced almonds. Bake until the tops and  bottoms are golden brown, 18-25 minutes. Transfer to a wire rack and let cool at 10 minutes before serving. If you can wait!